4. Node and Edge Column Data
Interaction networks are useful as stand-alone models but they are most powerful for answering scientific questions when integrated with additional information. Cytoscape Web allows the user to add arbitrary node, edge and network information as node/edge/network column data. This could include, for example, annotation data on a gene or confidence values in a protein-protein interaction. These column data can then be visualized in a user-defined way by setting up a mapping from columns to network attributes (colors, shapes, and so on). The section on Styles discusses this in greater detail.
4.1. Import Data Table Files
Cytoscape Web offers support for importing data from delimited text data tables.
Sample Data Table 1
| GENE | COMMON | gal1RGexp | gal1RGsig |
|---|---|---|---|
| YHR051W | COX6 | -0.034 | 0.37 |
| YHR124W | NDT80 | -0.09 | 0.27 |
| YKL181W | PRS1 | -0.167 | 0.0062 |
The data table file should contain a primary key column and at least one data column. The number of data columns is unlimited, and the first row of data can be used as column names. Alternatively, you can specify each column name from the Data → Import → Table from File… interface.
Basic Operation
Load your network via Data → Open network(s) from NDEx, or Import → Network from File in the Data option of the Menu Bar.
Select Data → Import → Table from File….
Select a data file in either .txt or .csv format. Alternatively, you can click the Import Table from File… button
 in the Table Panel.
The Edit Column Definitions interface will open:
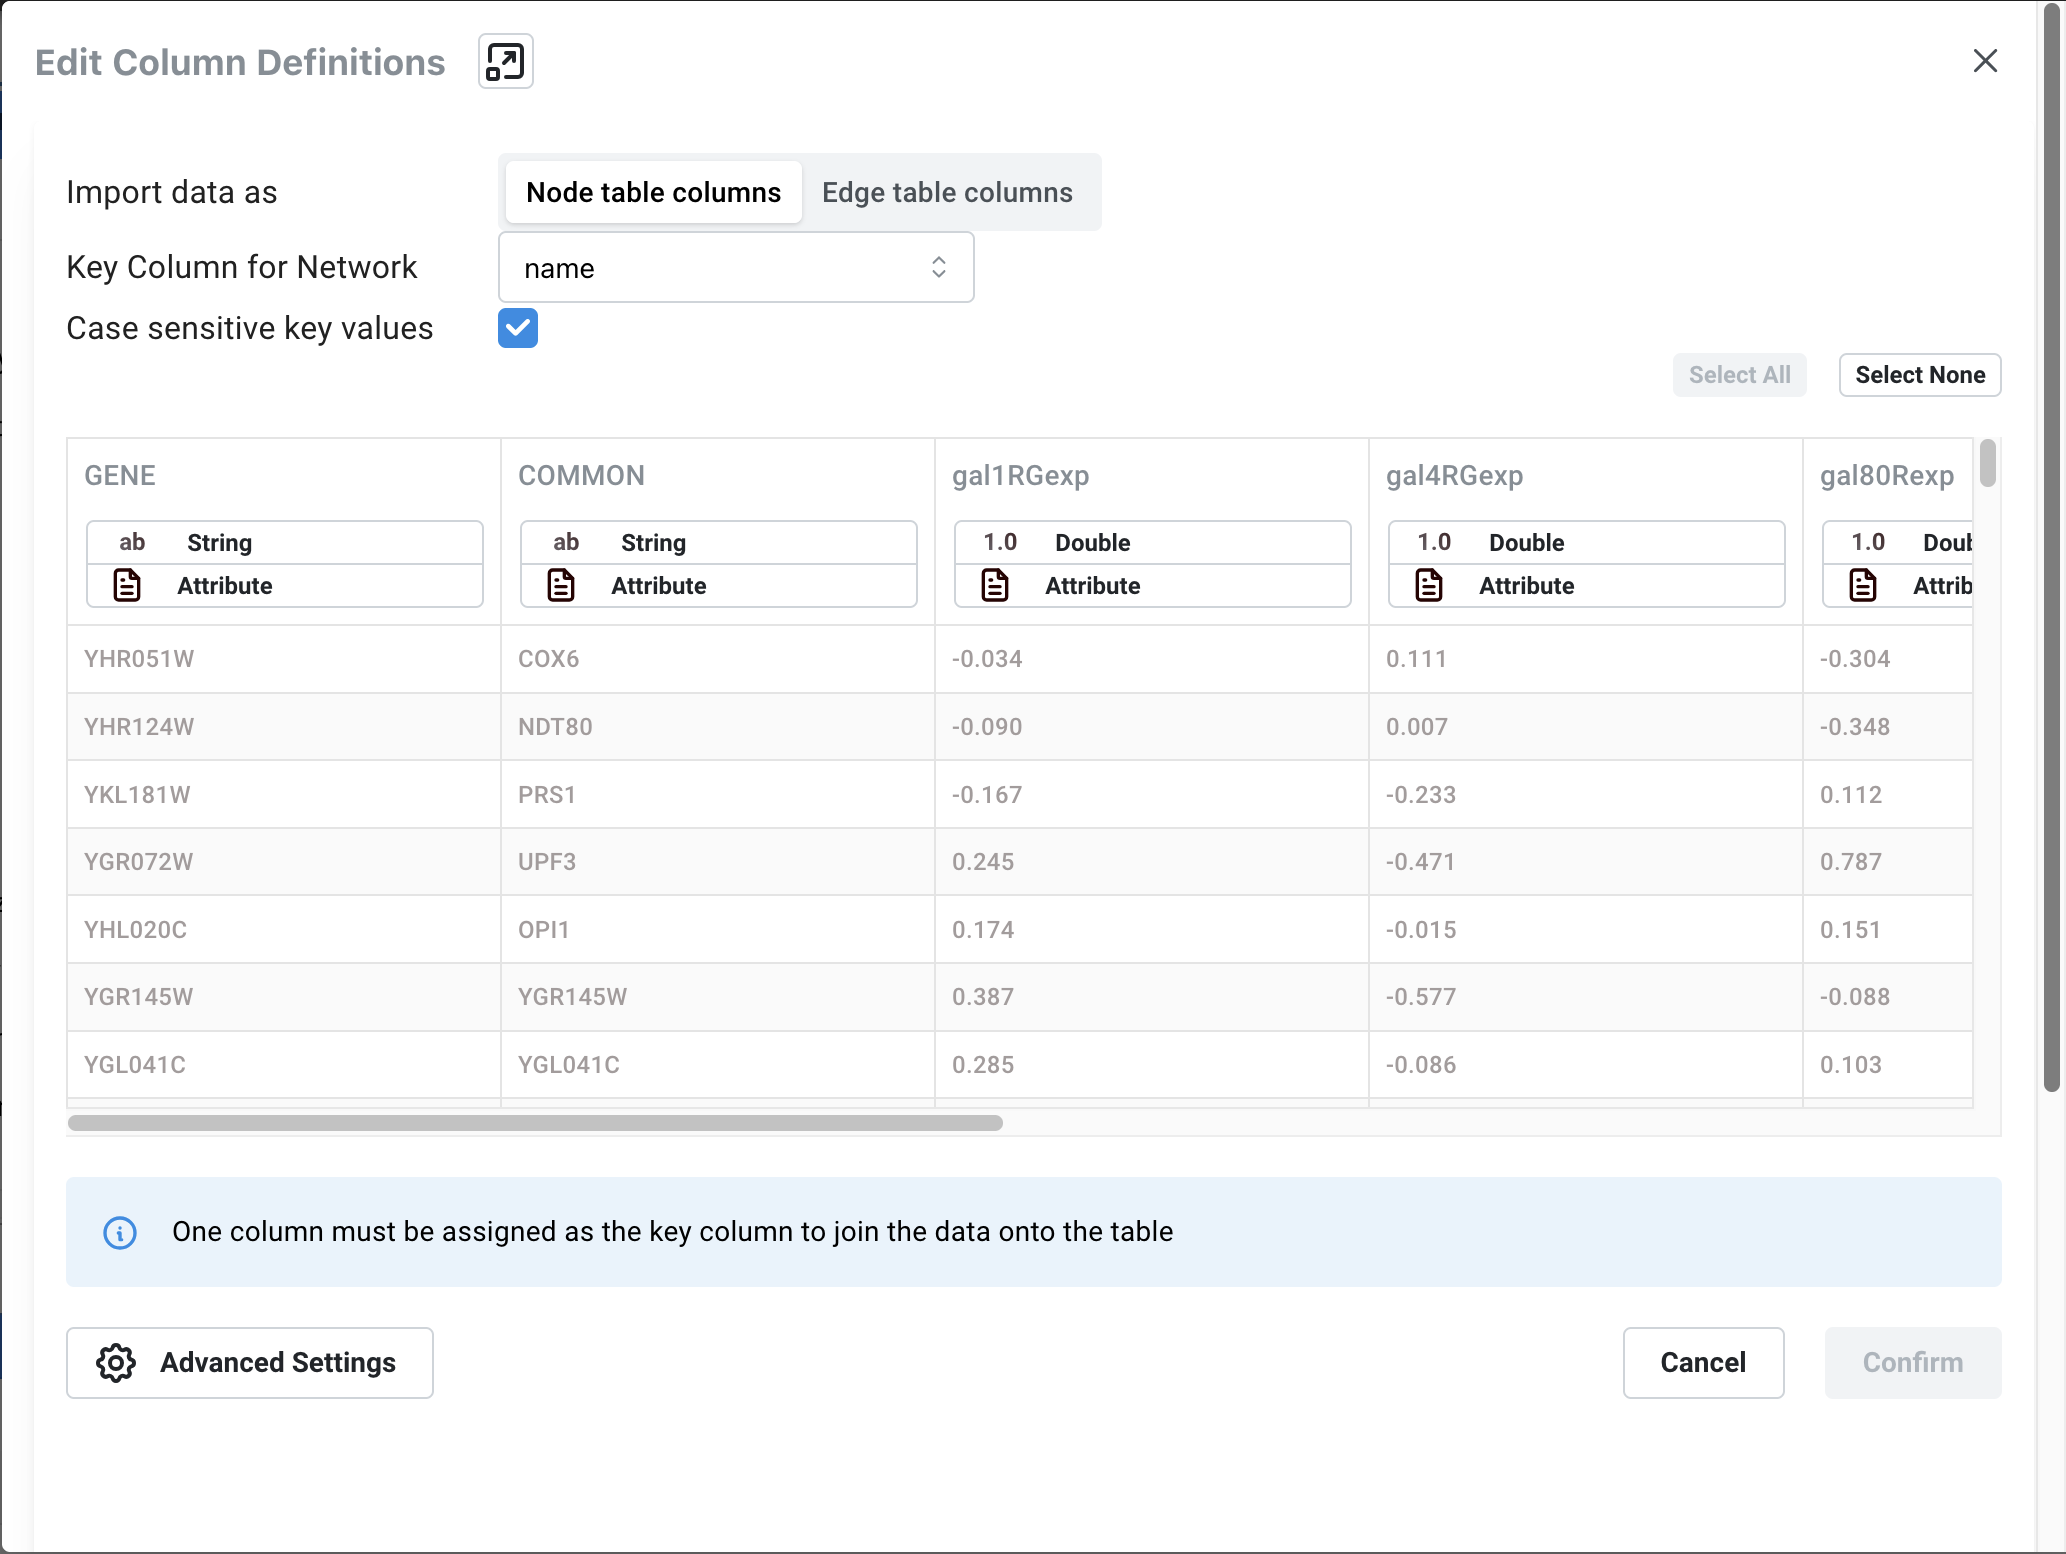
First, select where you want to import your data to under Import data as, either Node table columns or Edge table columns.
Next, designate which column in your network contains the Key to be used to map the network to the data under Key Column for Network.
To select a Key column in the data file, click on the column header, and click the key icon under Meaning in the pop-up interface. Make sure the column designated as key matches the key in the network.
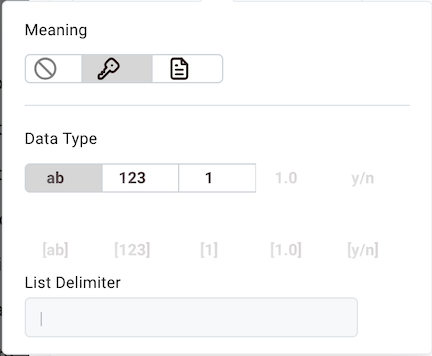
Similarly, to change the data type of a column, for example from integer to string, click the column header and select the correct data type under Data Type.
A message at the bottom of the interface will inform you of how many rows of data will be imported to your network. Click Confirm to continue.
The Advanced Settings allows you skip one or more of the first rows of data, and to specify if the first row contains column names.
Click Confirm to import.
Table Panel
When data has been imported, it is visible in the corresponding tab in the Table Panel:

Column data can be edited by double-clicking the cell. Once finished editing, click outside of the editing cell in the Table Panel to save your edits. If you want to apply the same value to all rows in the column, select APPLY VALUE TO COLUMN at the top. Similarly, you can choose to apply your edits to all selected nodes by clicking APPLY VALUE TO SELECTED NODES. Pressing Esc while editing will undo any changes.
The data in the Table Panel can be searched, using the
 button.
The columns in the Table Panel can be moved by clicking on the column header and dragging it to the desired location.
To select a node in the network corresponding to a row in the Table Panel, select the row and then click SELECT NODES at the top.
Rows in the panel can be sorted by specific column. To sort, click on a column heading and select the Sort Ascending
 or Sort Descending
  button.
A new column can be created using the Insert New column
 button. Columns can be deleted using the Delete
Columns…
button. Columns can be deleted using the Delete
Columns…
 button. This will remove the column from Cytoscape Web completely, not just
from the Table Panel.
button. This will remove the column from Cytoscape Web completely, not just
from the Table Panel.Columns can be renamed by clicking on the Rename column
 button and typing in a new name.